Quilt Hanging Solutions
Any quilt can be hung on the wall, from small art quilts to bed-size quilts.
Quilts may be hung using bone rings, fabric tabs or a hanging sleeve to fit on a rod. Choose the hanging solution that works for the size and weight of your quilt. Small quilts can be hung from tabs, bone rings, clip-on rings or a full rod, but only a sturdy rod should be used for larger quilts.
Hanging Sleeves
The size of the hanging sleeve you need depends on the diameter of the rod to be used. Smaller wall quilts can use a narrower rod while larger quilts require something sturdier.
1. Cut a strip of fabric (or strips to join), 6" to 10" wide and at least 1 1/2" longer than the width of the edge of the quilt. Note: A 6"- to 10- wide strip will be wide enough for most hanging rods.
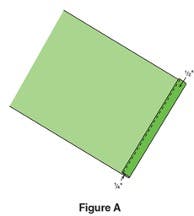
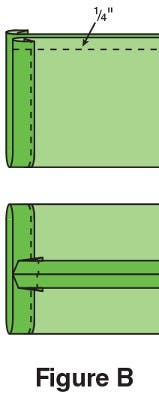
2. Turn each end of the strip 1/4" to the wrong side and press. Turn 1/2" again to the wrong side and press; stitch close to the second fold to hem (Figure A).
3. Fold the hemmed strip with right sides together along the length and stitch. Press the seam open. Turn the sleeve right side out and press with the seam centered (Figure B).
4. Center the sleeve on the top back side of the quilt, with the seam facing back, and hand-stitch the top edge in place.
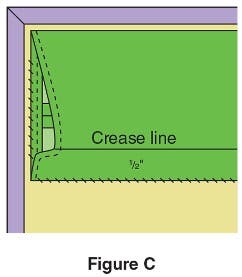
5. Hand-stitch the back side of the sleeve to the quilt backing 1/2" from the bottom pressed edge. This allows space for the rod while preventing pulling on the front of the quilt (Figure C).
6. Stitch the hemmed edges in place through the backing fabric only to finish. Note: Some quilters like to insert the hanging sleeve into the seam at the top edge when sewing binding to the quilt edge.
7. To hang the quilt, insert the dowel or rod through the sleeve.
Hanging Tabs
Fabric hanging tabs are an alternative to a full hanging sleeve for a small wall quilt. This is often an easy alternative to stitched-on rings or clip-on curtain rings.
Cutting
Cut 2 (4" x 4 1/2") rectangles of complementary or matching fabric.
Cut 2 (4" x 2 1/4") rectangles of scrap batting.
Note: For larger wall quilts, additional hanging tabs can be added, if desired.
Assembly
1. Fold and press each fabric rectangle in half, right sides together.
2. Layer a batting rectangle on top of each folded fabric rectangle and stitch through all layers on the open side (Figure D).

3. Turn the pieces right side out, with batting inside; press. Topstitch along both long sides.
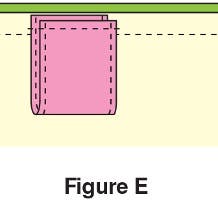
4. Fold the stitched tabs in half and position them on the back of the quilt, matching the raw edges to the raw edge of quilt top and spacing the tabs equally apart along the top raw edge of quilt.
5. Stitch the tabs into place at the binding 1/4" seam lines. Turn the binding to the quilt back and hand-stitch it in place to complete the binding as usual (Figure E).