Machine-Stitching Set-In or Y-Seams
Some designs, like stars, require set-in or Y-seams. Here are the secrets to success for machine-stitching this type of seam.
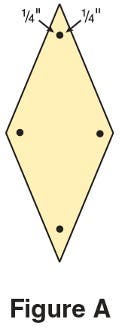
1. Accurately mark dots at the seam allowance intersections of the corners and tips of all pieces (Figure A).
![Machine Stitching Figure A](https://www.anniesattic.com/media/wysiwyg/machine-stitching-figure-a.jpg)
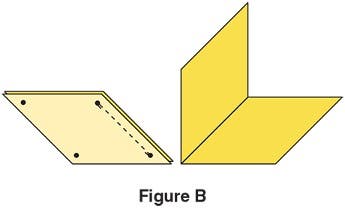
2. Join two diamond pieces, stopping and starting stitching at the dots; secure the seams at the dots (Figure B). Press the seam open.
![Machine Stitching Figure B](https://www.anniesattic.com/media/wysiwyg/machine-stitching-figure-b.jpg)
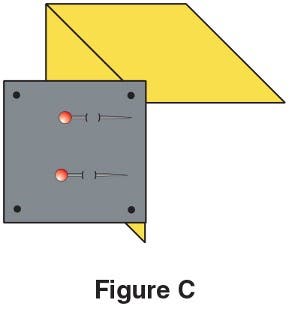
3. Pin the triangle or square piece to the stitched diamond units, matching the dots (Figure C).
![Machine Stitching Figure C](https://www.anniesattic.com/media/wysiwyg/machine-stitching-figure-c.jpg)
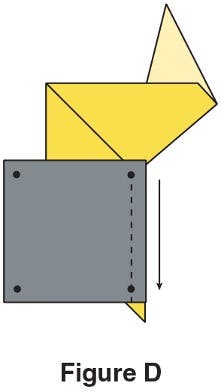
4. Holding the adjacent seam allowance out of the way, insert the needle into the inner dot, and sew from the inner dot to the outer edge (Figure D). Note: Some people prefer to stitch from the outer edge to the inner dot so that the seam allowances will not be in the way under the presser foot. If you have any movement at all during stitching, sewing from the outside to the inside means that the dots at the center may not align or you may get a tiny wrinkle. This is avoided by sewing from the center dot toward the outer edge.
![Machine Stitching Figure D](https://www.anniesattic.com/media/wysiwyg/machine-stitching-figure-d.jpg)
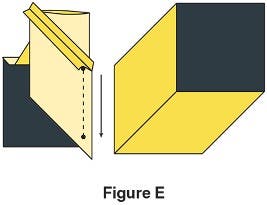
5. Repeat stitching from the inner dot to the outer edge on the other part of the Y, holding the adjacent seam out of the way (Figure E).
![Machine Stitching Figure E](https://www.anniesattic.com/media/wysiwyg/machine-stitching-figure-e.jpg)
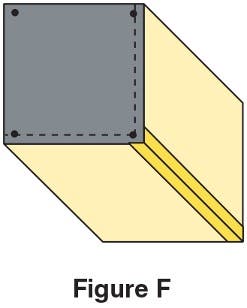
6. Press the seams (Figure F).
![Machine Stitching Figure F](https://www.anniesattic.com/media/wysiwyg/machine-stitching-figure-f.jpg)