Foundation Piecing
Anytime you stitch fabric shapes to a foundation to create a pieced design, you are foundation piecing. Foundation piecing is used for string piecing (stitching multiple fabric strips together) or for crazy quilting (stitching odd fabric shapes together).
String Piecing
1. Cut a piece of foundation material slightly larger than the block or piece size indicated in the pattern instructions. Common foundation materials are muslin or other compatible solid-color fabrics, lightweight batting and lightweight, sew-in woven interfacing.
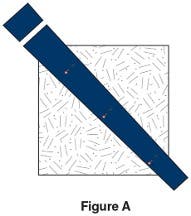
2. Select a precut strip and pin it along a diagonal of the foundation square as shown in Figure A. Trim the strip to a manageable length if necessary, with extra extending at each end, again referring to Figure A.
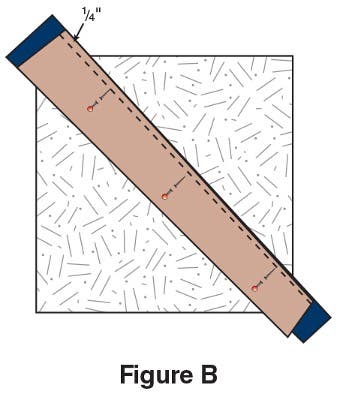
3. Select another strip and pin it right sides together with the first strip, trimming excess the as in step 2. Stitch 1/4" from the aligned edges of the pinned strips as shown in Figure B.
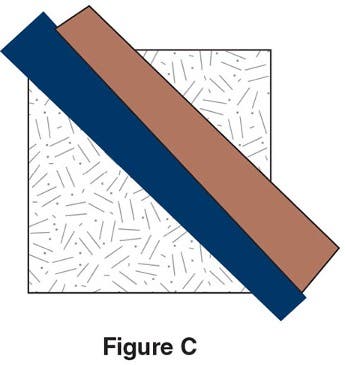
4. Press the top strip to the right side as shown in Figure C.
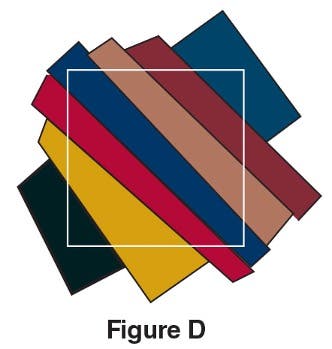
5. Continue adding strips to the foundation piece in this manner until the foundation is completely covered as shown in Figure D.
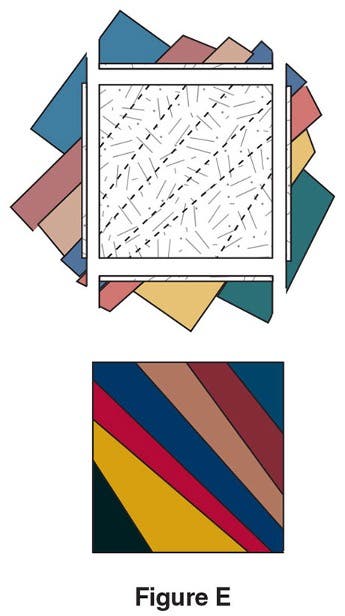
6. Trim the stitched foundation piece to the size indicated in the pattern as shown in Figure E to complete the block unit.
Crazy Quilting
For crazy quilting, use odd shapes beginning at the center of the foundation piece and add pieces in a circular manner. When the block is completed, it is traditional to stitch over the seams with a variety of embroidery stitches. Add hand embroidery along the seams and add embroidery motifs, beaded designs or lace motifs in the pieces for a traditional look.
1. Cut a piece of foundation material slightly larger than the block or piece size desired. Common foundation materials are muslin or other compatible solid-color fabrics, lightweight batting and lightweight, sew-in woven interfacing.
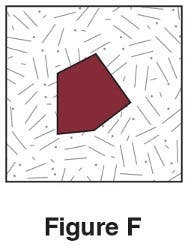
2. Center a shape on the foundation material (Figure F). Note: Crazy quilting is a good way to use up odd-shaped scraps from other projects that may not be large enough to subcut squares or triangles from. Traditionally, scraps were used from dressmaking projects, so cotton, silk, satin, velvet and velveteen fabrics were often used together.
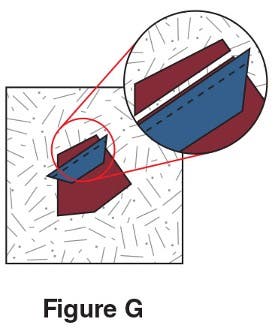
3. Position a second shape along one edge of the first shape with right sides together and stitch them together (Figure G). Note: Shape edges will not necessarily be even. Trim shapes along the seams, leaving a 1/4" seam allowance as shown in Figure G.
4. Press the second shape away from the first shape referring to Figure H.
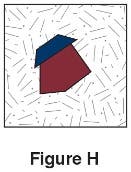
5. Press the second shape away from the first shape referring to Figure H.