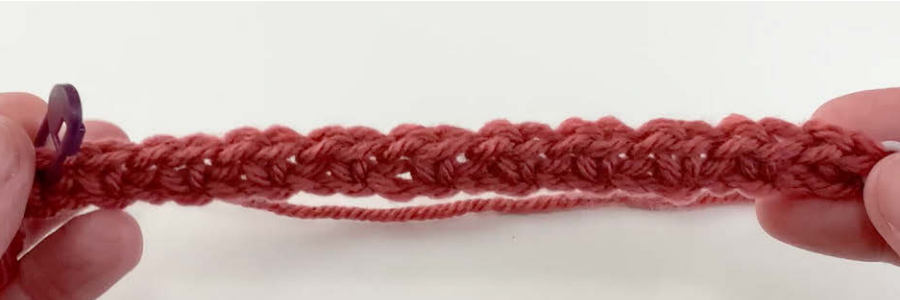
A variety of yarn colors and an easy-to-follow stitch repeat make this beginner-friendly scarf pattern fun to crochet. You are sure to find this free crochet pattern very addictive to work.
Skill Level
Beginner
Finished Measurements
10 inches wide x 65 inches long
Note: These are the measurements your piece should be close to once completed. In future projects we will provide more information on how to match the measurements exactly. For now, anything close is fine.
Gauge
Gauge is not critical for this project.
Note: Gauge is the number of stitches (sts) the designer worked over a specific measurement. To achieve the finished measurements of a pattern, you will need to match these numbers. You will see and learn more about this as your skill level progresses.
Materials
At least 90 yds each of worsted-weight acrylic yarn in 8 colors of your choice
- Premier Yarns Anti-Pilling Everyday Worsted medium (worsted) weight acrylic yarn (31/2 oz/180 yds/100g per skein) Tip: Look for the #4 icon on the label. #4 is used to label worsted-weight yarns.
- Size 5.5mm crochet hook (which can also be listed as I or 9)
- Crochet hook one size smaller (optional)
- Removable stitch markers (optional)
- Tapestry needle for weaving in ends (optional).
1 skein each:
- #1188-11 Rococo rose
- #1188-01 cream
- #1188-09 peach sand
- #1188-06 indigo
- #1188-17 cerulean
- #1147-12 sage
What You Will Learn
In this pattern, you will learn how to hold your hook and yarn, how to make a slip knot, chain and single crochet, how to use stitch markers, how to skip a stitch, how to work in a chaAin space, how to work short repeats of stitches and rows, how to fasten off and how to make fringe.
Right-handed video instructions
Left-handed video instructions
Pattern Notes
This scarf is created by working from long side to other long side.
Use as many or as few colors to create this scarf as desired. Randomly grab a new color for each row. Repeat colors as you choose.
Work a swatch of stitching with the video instructions. If your row 1 wants to buckle, try working the chain stitches of row 1 with the smaller hook and then switching to the larger hook for creating the stitches.
You will not weave in ends on this scarf. Yarn tails will be hidden in the fringe. If you opt to omit the fringe, you will need to weave in your ends.
SCARF
Row 1:
Step 1:
Note: You may want to begin (beg) with smaller hook (see Pattern Notes).
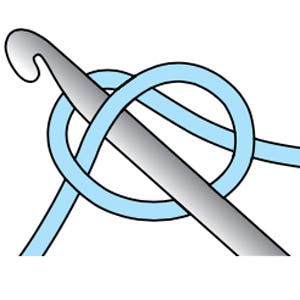
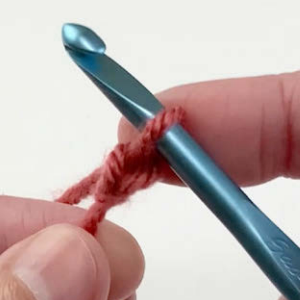
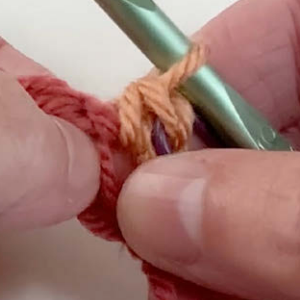
With yarn color of your choice, make a slip knot with about a 5-inch tail.
Note: This means cut the yarn, leaving a 5-inch tail, then pull the yarn through the stitch (st). The yarn tails will become part of the fringe.
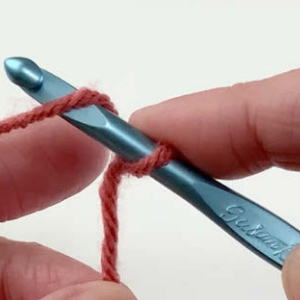
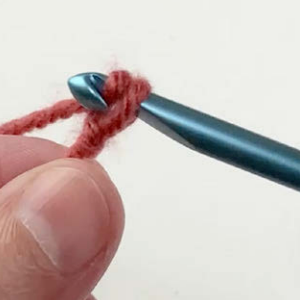
Place slip knot on hook.

Step 2:
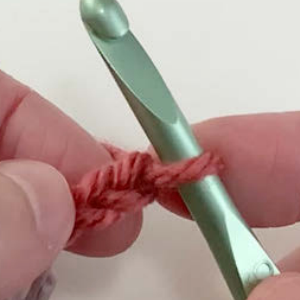
Chain (ch) 262.
Note: You may find it helpful to use stitch markers while creating this long chain (ch). By placing a marker every 20–25 chains (chs), it will be easier to count your chains (chs) if you get distracted in the middle of working them.
Step 3:
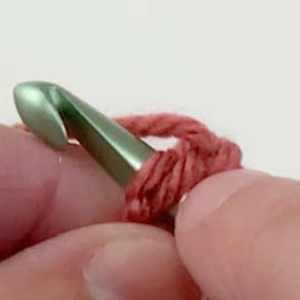
Turn to work back across the chains (chs).
Note: If chains (chs) were worked with smaller hook, change to larger hook for remainder of project.
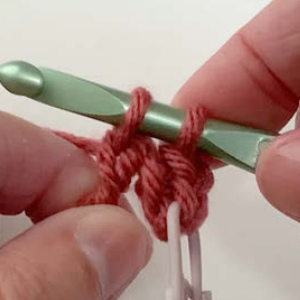
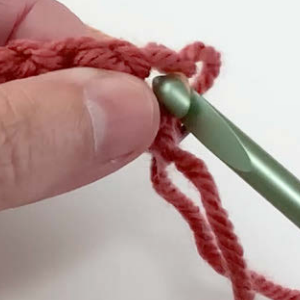
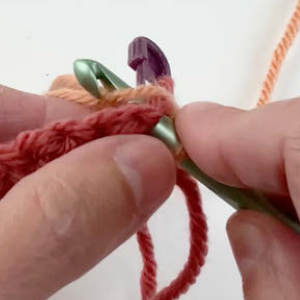
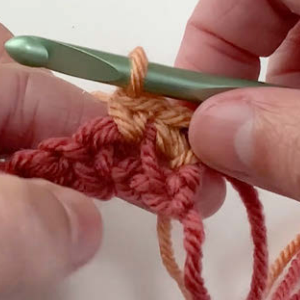
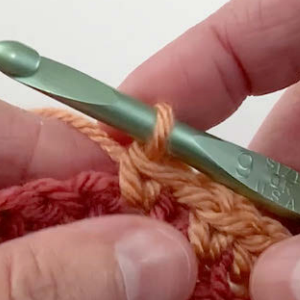
Single crochet (sc) in 2nd chain (ch) from hook.
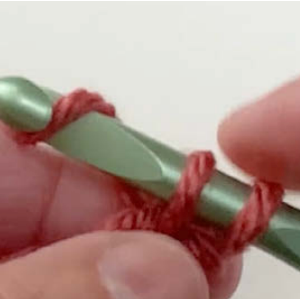
Place stitch marker in the top of this stitch (st).
Note: This is optional but will help you easily see where your first (st) is for working the next rows, especially if you set your work down and walk away for a while.

Step 4:
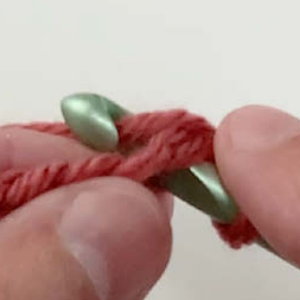
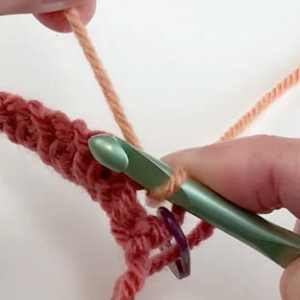
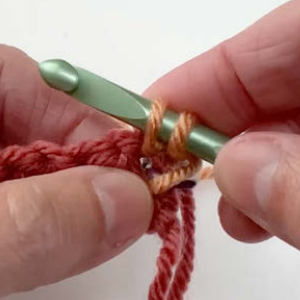
*Chain (ch) 1.
Skip (sk) next chain (ch).
Note: By making a chain (ch) and skipping (sk) the next chain (ch), you will be creating what is called a chain space (ch sp). You will work into this space (sp) on the next row.
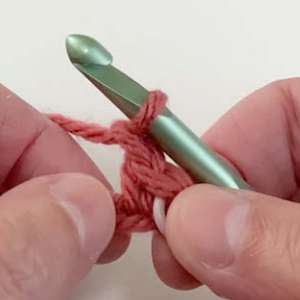
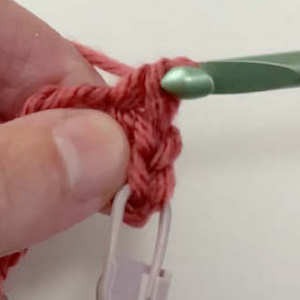
Step 5:
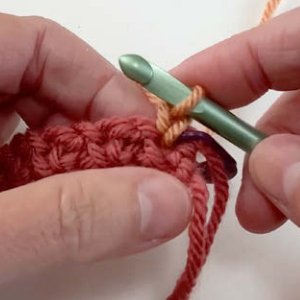
Repeat (rep) from * across
Note: This means you will go back to the instructions where you see the * and repeat (rep) the chain (ch) 1, skip (sk) next chain (ch) and single crochet (sc) in the next chain (ch) across all of your remaining (rem) chains (chs). This is called a stitch (st) repeat (rep) because you are repeating this group of stitches (sts) all the way across.
Step 6:
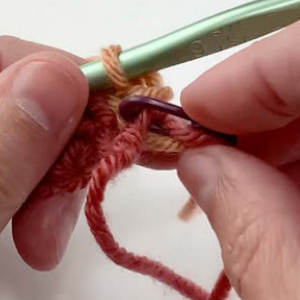
Place stitch marker in last stitch (st).
Note: This is optional but will help you easily see where your last stitch (st) is for working the next rows.
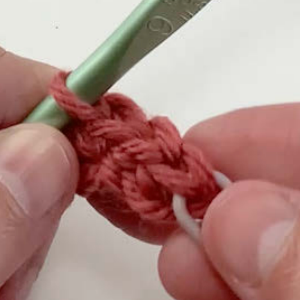
Step 7:
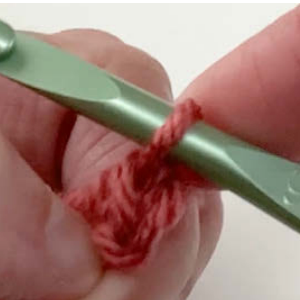
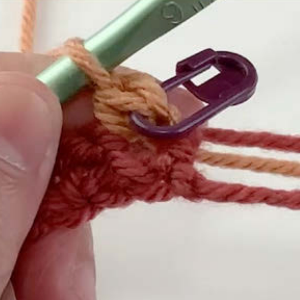
Fasten off, leaving a tail about 5 inches long.
Note: Fasten off means cut the yarn, leaving about a 5-inch tail, then pull through the stitch (st).
Turn work counterclockwise.
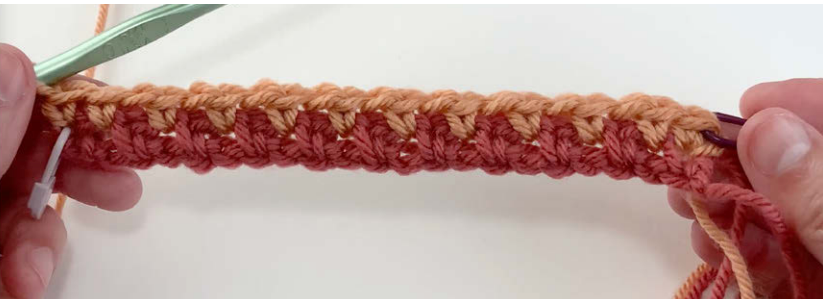
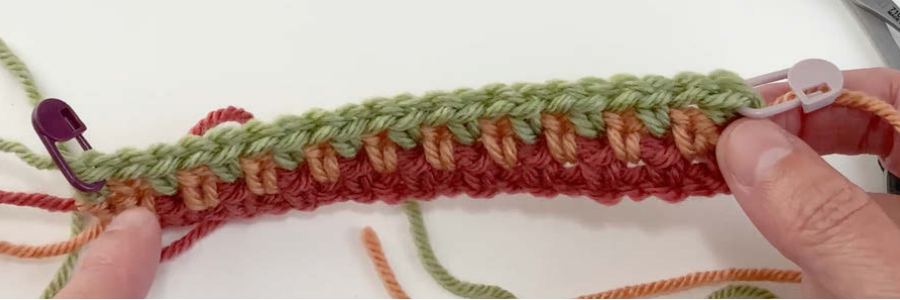
(131 single crochet {sc}, 130 chain spaces {ch sps})
Note: The number of stitches you see in parentheses is the stitch (st) count. It means you should have 130 single crochet (sc) and 130 chain spaces (ch sps) in the completed row. Stitch (st) counts help you stay on track throughout a pattern.
Row 2:
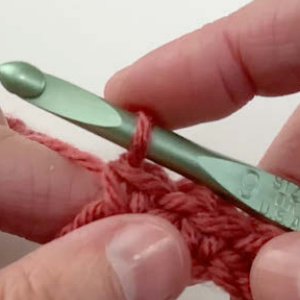
Step 8:
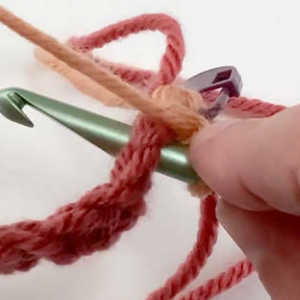
With yarn color of your choice and leaving a 5-inch tail, insert hook in first (marked) stitch (st).
Pull a loop (lp) of yarn through.
Step 9:
Chain (ch) 1 to build up the height of your row.
Step 10:
Single crochet (sc) in the first stitch (st).
Note: You will work under the chain-1 (ch-1) into the empty space (sp) this is what working in the chain space (ch sp) means.

Step 11:
Move stitch marker to this first stitch (st).
Step 12:
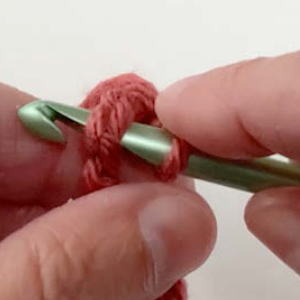
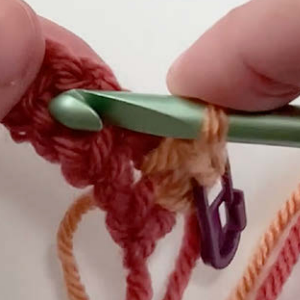
Single crochet (sc) in first chain space (ch sp).
Step 13:
*Chain (ch) 1.
Skip (sk) next single crochet (sc).
Step 14:
Single crochet (sc) in next chain space (ch sp).
Step 15:
Repeat (rep) from * to last stitch (st).
Note: This is the stitch (st) repeat (rep) for this row. It’s a slight shift from row 1. You should have your marked single crochet (sc) left to work into.
Single crochet (sc) in last stitch (st).
Step 16:
Fasten off, leaving a tail about 5 inches long.
Move stitch marker to last stitch (st).
Turn work counterclockwise.
Step 17:
(132 single crochet {sc}, 129 chain spaces {ch sps})
Note: You will have more single crochet (sc) on this row and fewer chain spaces (ch sps).
Row 3:
Step 18:
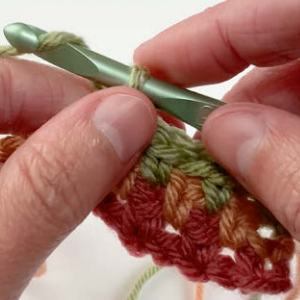
With yarn color of your choice and leaving a 5-inch tail, insert hook in first (marked) stitch (st).
Pull a loop (lp) of yarn through.
Step 19:
Chain (ch) 1 to build up the height of your row. Single crochet (sc) in the first stitch (st).
Move stitch marker to this first stitch (st). *Chain (ch) 1.
Skip (sk) next single crochet (sc).
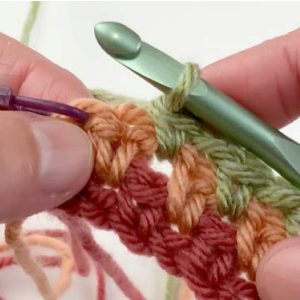
Step 20:
Single crochet (sc) in next chain space (ch sp).
Step 21:
Repeat (rep) from * across to last chain space (ch sp).
Step 22:
Chain (ch) 1.
Skip (sk) next single crochet (sc).
Single crochet (sc) in last stitch (st).
Step 23:
Move stitch marker to last stitch (st).
Fasten off, leaving a tail about 5 inches long.
Step 24:
Turn work counterclockwise. (131 single crochet {sc}, 130 chain spaces {ch sps})
Step 25:
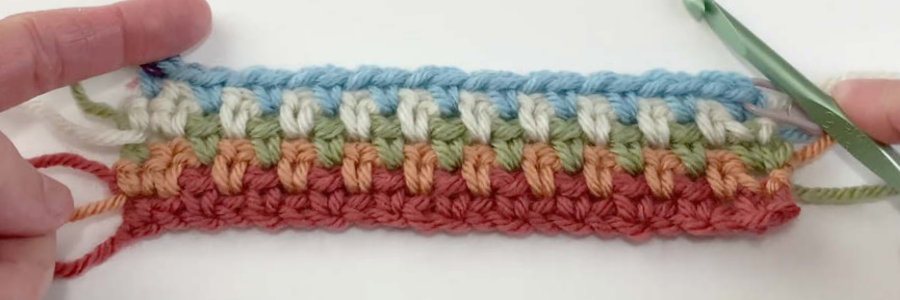
Repeat (rep) rows 2 and 3 until Scarf is about 10 inches wide.
Note: The repeat (rep) means you will work first row 2 and then row 3 over and over again until your scarf is the designated width. You may want to periodically stop working and check that your edges are remaining straight. If the edges seem like they are pinching inward (getting more narrow), your tension may be tightening up. You may want to undo a row or two and rework them or work with a hook one size larger. Using a larger hook will help to keep your tension looser.
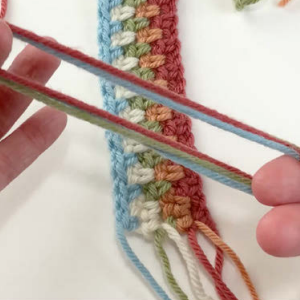
Finishing
Fringe
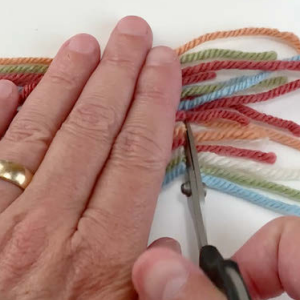
Step 26:
Cut 10 or 11 12-inch strands of each color of yarn.
For each knot of Fringe, fold 3 random-color lengths in half.
Step 27:
Insert hook from wrong side (WS) into stitch (st) or chain space (ch sp).
Note: The wrong side (WS) of the work is the non-public side or the back side of the work. For this pattern, the fabric is reversible, meaning both sides look the same, and so you can choose either side to be your wrong side (WS).
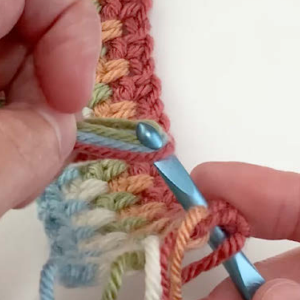
Step 28:
Pull folded end through.
Pull ends through fold.
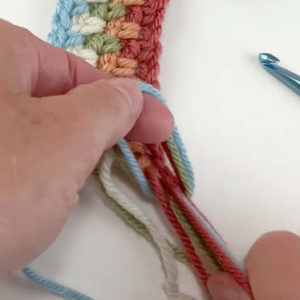
Step 29:
Pull ends to tighten knot.
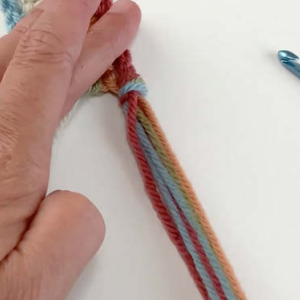
Step 30:
Work Fringe in every 3rd row 1 stitch (st) or space (sp) in from the edge on each short end.
Trim ends evenly to 4–41/2 inches or desired length.