Picot Stitch (abbreviated p or picot)
A picot is a decorative stitch that creates a small round bump where it is worked. Picots are created by chaining the number of stitches called for in the pattern and then working a slip stitch in the indicated stitch or space. The picot stitch is great to use for the edging on a crochet project. It’s also a good way to add texture to a project.
Picots have several variations. Picots can be worked over any number of chains. To finish them, you can slip stitch into the first chain or the top of the stitch. Below are a video and explanations for two versions of the picot stitch.
Note: Crochet does not have standardized naming conventions for special stitches. Designers may call stitches by whatever name they prefer. For this reason, it is difficult to search online for how a particular special stitch is created. Another reason it is hard to find the “correct” way to work a particular special stitch is because each designer might work a special stitch in their own unique way. Be sure to follow the directions stated in your pattern for how to work the stitch.
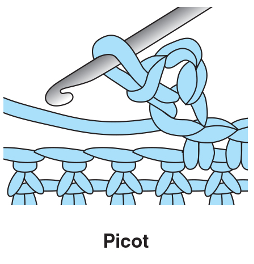
Version One
Chain 3, insert the hook into the top of the base stitch, yarn over, pull through all of the loops on the hook. Another way to state this is: chain 3, slip stitch into the top of the stitch.
This version creates a wider, rounded stitch.
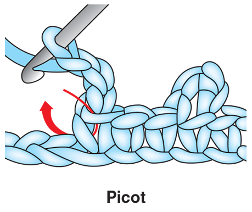
Version Two
Chain 3, insert the hook into the back bar of the first chain, yarn over, pull through all of the loops on the hook. Other ways to state this are: chain 3, slip stitch in the back bar of the first chain or chain 3, slip stitch in the first chain.
This version creates a narrower, pointier picot stitch.